For years, the microwave has been a go-to appliance not just for heating leftovers, but also for a popular kitchen hack: sterilizing sponges. The idea is simple – blast those grimy kitchen workhorses with heat to zap away unseen germs. But as you navigate the world of kitchen hygiene, it’s essential to understand both the perceived benefits and the evolving scientific understanding behind this common practice. While once heralded as highly effective, recent research sheds a more nuanced light on microwaving your sponge. This guide will walk you through the traditional method, its safety protocols, and crucially, discuss what the latest science suggests about its actual effectiveness, helping you make informed decisions for a truly clean kitchen.
What is a Microwave Oven and How Does it Work?
Before diving into sponge sterilization, let’s briefly understand the device itself. A microwave oven uses microwave radiation to heat food. These electromagnetic waves cause water molecules within the food (or, in this case, a wet sponge) to vibrate rapidly, generating heat through friction. This internal heating mechanism is what makes microwaves incredibly fast at cooking and, theoretically, at killing microorganisms. Early studies found this thermal process to be highly efficient at reducing bacterial populations.
A Brief History of Microwave Sponge Sterilization
|
Our Picks for the Best Microwave oven in 2026
As an Amazon Associate I earn from qualifying purchases.
|
||
| Num | Product | Action |
|---|---|---|
| 1 | GASLAND 30 Inch Over-the-Range Microwave Oven, 1.7 Cu.Ft Over Stove Microwave, 1000W with 10 Power Levels, Sensor & One-Touch Cooking, 300 CFM Venting, LED Cooktop Light, Black Kitchen Microwave |

|
| 2 | COMFEE' Retro Small Microwave Oven With Compact Size, 9 Preset Menus, Position-Memory Turntable, Mute Function, Countertop Microwave For Small Spaces, 0.7 Cu Ft/700W, Green, AM720C2RA-G |
|
| 3 | COMFEE CMO-C20M1WH Retro Microwave with 11 power levels, Fast Multi-stage Cooking, Turntable Reset Function Kitchen Timer, Speedy Cooking, Weight/Time Defrost, Memory function, Children Lock, 700W |
|
| 4 | COMFEE' Retro Small Microwave Oven With Compact Size, 9 Preset Menus, Position-Memory Turntable, Mute Function, Countertop, Perfect For Small Spaces, 0.7 Cu Ft/700W, Red, AM720C2RA-R |
|
| 5 | BLACK+DECKER EM720CB7 Digital Microwave Oven with Turntable Push-Button Door, Child Safety Lock, 700W, Stainless Steel, 0.7 Cu.ft |
|
| 6 | TOSHIBA EM131A5C-SS Countertop Microwave Ovens 1.2 Cu Ft with 12.4" Removable Turntable Smart Humidity Sensor, 12 Auto Menus Mute Function ECO Mode Easy Clean Interior, 1000W, Silver |
|
| 7 | Chefman Countertop Microwave Oven 0.7 Cu. Ft., 700 Watts with 10 Power Levels, 6 Cooking Presets with One-Touch Express Cook, Eco Mode, Child Safety Lock, & Mute Button - Black |
|
| 8 | TOSHIBA EM131A5C-BS Countertop Microwave Ovens 1.2 Cu Ft, 12.4" Removable Turntable Smart Humidity Sensor 12 Auto Menus Mute Function ECO Mode Easy Clean Interior Black Color 1000W |
|
| 9 | COMFEE' Retro Small Microwave Oven With Compact Size, 9 Preset Menus, Position-Memory Turntable, Mute Function, Countertop Perfect For Spaces, 0.7 Cu Ft/700W, Cream, AM720C2RA-A |
|
| 10 | COMFEE' EM720CPL-PMB Countertop Microwave Oven with Sound On/Off, ECO Mode and Easy One-Touch Buttons, 0.7cu.ft, 700W, Black |
|
The concept of using a microwave to clean sponges gained significant traction after studies, notably one by the U.S. Department of Agriculture (USDA) in 2007, reported impressive bacterial reduction rates. These findings suggested that microwaving a wet sponge for a minute or two could eliminate nearly 99.99999% of bacteria, including common culprits like E. coli and Salmonella. This made microwaving seem like a simple, accessible, and highly effective way for households to combat germs on one of their dirtiest kitchen tools.
The Traditional Method: How to Microwave a Sponge
If you choose to use the microwave method, it’s crucial to follow specific steps to maximize its potential effectiveness and ensure safety. This process aims to generate enough heat and steam to kill a significant portion of the bacteria residing within the sponge.
Step-by-Step Guide to Microwaving Your Sponge
- Inspect Your Sponge: This is the most critical first step. Absolutely ensure your sponge contains no metallic components, scrubbing pads with metal fibers, or any other metal parts. Metal in a microwave can cause sparks, potentially damaging your appliance or even leading to a fire. Always check the manufacturer’s instructions to confirm your sponge is microwave-safe.
- Saturate with Water: Thoroughly wet the sponge until it is completely saturated. This is essential for creating the steam that helps to kill bacteria and prevents the sponge from drying out and potentially catching fire. You can hold it under a running faucet or immerse it in a bowl of water until it’s fully soaked.
- Place in a Microwave-Safe Container: Place the wet sponge in a microwave-safe bowl or dish. This can help contain any water that might escape during the heating process and makes it easier to remove the hot sponge safely.
- Microwave on High: Place the bowl with the wet sponge into the microwave. Heat on the highest power setting for 1 to 2 minutes. The exact time may vary based on your microwave’s wattage; a higher wattage might require less time.
- Cool Down Safely: Once the microwave cycle is complete, do not immediately touch the sponge. It will be extremely hot and can cause severe burns. Allow the sponge to cool down inside the microwave for at least 10-15 minutes, or use oven mitts or tongs to carefully remove it and let it cool on a heat-resistant surface. Once cooled, wring out any excess water.
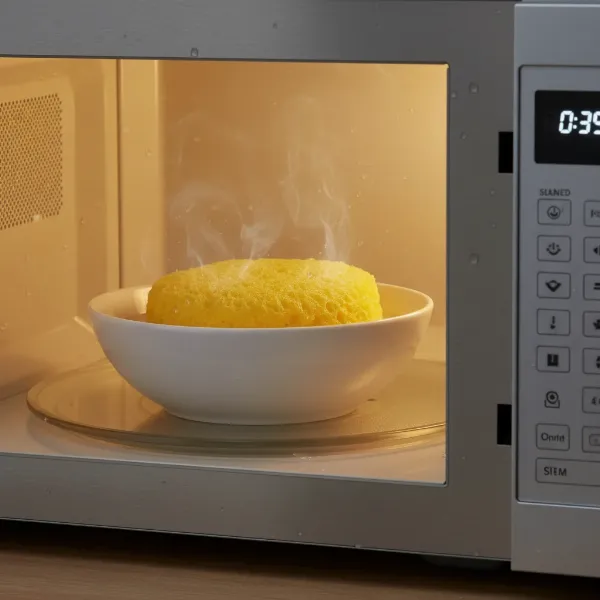 Wet kitchen sponge in a microwave-safe bowl inside a microwave oven during sterilization process.
Essential Safety Precautions
- Always Wet: Never microwave a dry or barely damp sponge. The lack of water can cause the sponge to scorch, melt, or even ignite, posing a serious fire hazard.
- No Metal: Reiterate that metal of any kind is a strict no-go for microwaves.
- Beware of Steam and Heat: The sponge and any water in the container will be scalding hot after microwaving. Use protective measures like oven mitts or tongs to avoid burns.
- Ventilation: Ensure your kitchen is well-ventilated, especially if you notice any unusual odors during or after the process.
Is Microwaving Sponges Truly Effective? The Latest Scientific Insights
While the microwave method has been a popular household tip for years, more recent scientific investigations have introduced a significant caveat, challenging the long-held belief in its supreme effectiveness.
The Nuance of Bacterial Elimination
Early studies, like the 2007 USDA research, demonstrated that microwaving could kill a vast percentage of bacteria. However, subsequent research, particularly a widely discussed 2017 study published in Scientific Reports, presented a more complex picture. This study found that while microwaving does kill many bacteria, it often targets the weaker strains. The more resilient, potentially pathogenic bacteria can survive the heat.
“Microwaving might remove some of the less hearty bacteria, but it leaves behind the stronger, more robust strains. This can inadvertently create a ‘survival of the fittest’ scenario, potentially leading to a sponge dominated by harder-to-kill pathogens.” – Dr. Sarah Miller, Environmental Microbiologist
This means that instead of sterilizing the sponge, you might actually be selecting for a community of tougher, more dangerous microorganisms. The uneven heating inherent in many microwaves further contributes to this problem, as some areas of the sponge may not reach temperatures high enough to eliminate all harmful microbes.
The Risk of Resistant Strains
The concern among microbiologists is that regular microwaving could promote the growth of heat-resistant bacteria. These “superbugs” could then become even more difficult to eliminate and pose a greater health risk in the kitchen. Therefore, while a sponge might appear cleaner and smell better after microwaving, it may still harbor dangerous bacterial populations that are now more concentrated and harder to kill.
Alternatives to Microwaving for Sponge Sanitation
Given the evolving understanding of microwave effectiveness, many experts now recommend alternative methods for sanitizing kitchen sponges that offer more consistent and thorough bacterial elimination.
Dishwasher with a Hot Cycle and Drying Feature
The dishwasher is widely considered one of the most effective ways to sanitize sponges. Placing your sponge in the top rack of a dishwasher and running it through a full cycle with hot water and a heated drying cycle can kill up to 99.9998% of bacteria. The combination of high heat and detergent provides a more comprehensive cleaning and sanitizing action compared to microwaving. The drying cycle is particularly important as it removes moisture, inhibiting further bacterial growth.
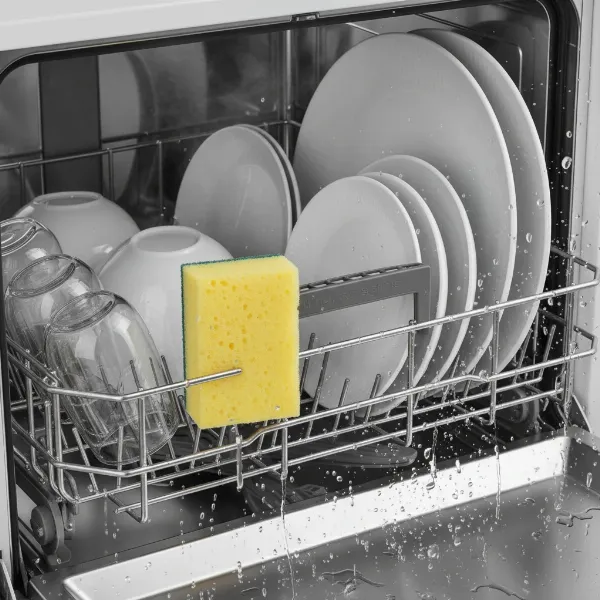 Yellow kitchen sponge placed on the top rack of a dishwasher, undergoing a hot sanitization cycle.
Bleach Solution Soak
A diluted bleach solution is another powerful disinfectant for sponges.
- Preparation: Mix 3/4 cup of bleach with one gallon of water.
- Soak: Submerge your sponge in the solution for approximately five minutes.
- Rinse: Thoroughly rinse the sponge under running water to remove all traces of bleach.
- Dry: Wring out the sponge completely and allow it to air dry.
This method effectively kills a broad spectrum of bacteria, viruses, and molds. Always handle bleach with care, ensuring good ventilation and avoiding contact with skin and eyes.
Other Methods and Their Limitations
- Boiling Water: Soaking a sponge in boiling water for five minutes can also kill many germs. However, this method requires constant supervision and can be less convenient than a dishwasher or bleach soak.
- Vinegar: While vinegar has some antimicrobial properties, it is generally not considered as effective as bleach or a hot dishwasher cycle for comprehensive sanitization of heavily contaminated sponges. It may help with odors but won’t reliably eliminate all harmful bacteria.
When to Replace Your Sponge: The Ultimate Solution
Regardless of how diligently you try to clean your sponge, it eventually reaches a point where it’s beyond effective sanitization. The most reliable way to maintain kitchen hygiene is through frequent replacement.
Signs It’s Time for a New Sponge
- Foul Odor: If your sponge starts to smell stale, musty, or simply unpleasant, it’s a clear indicator that bacteria have colonized it heavily.
- Visible Grime or Discoloration: If the sponge is visibly dirty, stained, or discolored and doesn’t return to a clean appearance after washing, it’s time to discard it.
- Torn or Worn Out: A worn-out sponge loses its effectiveness for scrubbing and can harbor more bacteria in its compromised structure.
- Regular Use: Even with regular cleaning, experts recommend replacing kitchen sponges every 1 to 2 weeks, especially with daily use. If a sponge has been used to wipe up raw meat juices, it should be immediately discarded to prevent cross-contamination.
By replacing sponges frequently, you minimize the risk of spreading harmful bacteria around your kitchen and ensure you’re always using an effective cleaning tool.
Maintaining Optimal Kitchen Hygiene
Beyond sponge care, adopting broader kitchen hygiene practices is crucial for preventing the spread of germs and ensuring a safe cooking environment.
- Separate Sponges: Use different sponges or cloths for different tasks. For instance, designate one sponge for dishes, another for countertops, and a separate one (or paper towels) for cleaning up raw meat juices.
- Air Dry Sponges: After each use, rinse your sponge thoroughly, wring out excess water, and allow it to air dry completely. Storing a damp sponge in a confined space promotes bacterial growth.
- Consider Alternatives: For some tasks, consider silicone sponges, dish brushes, or microfiber cloths, which tend to dry faster and can sometimes be more easily sanitized. Dish brushes, for example, often have a handle that keeps your hands away from the scrubbing surface and can be run through the dishwasher.
Conclusion: Making the Best Choice for Your Kitchen
While microwaving a sponge remains a common household practice for “sterilization,” recent scientific findings encourage a more cautious approach. It may reduce some bacterial load, but it might not eliminate the most dangerous pathogens and could even inadvertently select for more resilient strains.
For the most effective sanitization, consider utilizing your dishwasher’s hot cycle with a heated drying feature, or a properly diluted bleach solution. Ultimately, the best defense against kitchen germs found in sponges is frequent replacement, ideally every one to two weeks, and immediate disposal after contact with raw meats. By understanding these nuances and adopting comprehensive hygiene practices, you can ensure your kitchen remains a truly clean and healthy space.
What are your go-to methods for keeping your kitchen sponges fresh and germ-free?
Frequently Asked Questions
How often should I sanitize my kitchen sponge?
For optimal hygiene, it’s recommended to sanitize your kitchen sponge every two to three days, especially with regular use. However, even with frequent sanitization, you should replace your sponge entirely every 1 to 2 weeks to prevent bacterial buildup.
Can I microwave a dry sponge?
No, never microwave a dry sponge. A dry sponge can scorch, melt, or even catch fire due to the concentrated heat and lack of moisture. Always ensure the sponge is thoroughly saturated with water before microwaving to generate steam and prevent hazards.
What kind of sponges can be safely microwaved?
Only sponges made entirely of cellulose or plastic, without any metallic components, abrasive metal scrubbers, or synthetic fibers that could melt, should be microwaved. Always check the sponge’s packaging for specific microwave-safe instructions.
Is using a dishwasher more effective than microwaving for sanitizing sponges?
Yes, generally, using a dishwasher with a hot wash and heated drying cycle is considered more effective than microwaving for sanitizing sponges. The consistent high temperature, detergent, and complete drying provided by a dishwasher often result in a more thorough elimination of bacteria, yeasts, and molds.