Dreaming of café-quality lattes at home but don’t have a fancy espresso machine with a steamer? You’re in luck! Crafting beautifully frothed milk for your favorite coffee creations is surprisingly simple, even if all you have is a microwave and a jar. This guide will walk you through an effortless method to achieve velvety, frothy milk, transforming your morning brew into a delightful barista-style experience without the need for specialized equipment. Get ready to elevate your coffee game and impress yourself with perfectly frothed milk right from your kitchen.
What is Frothed Milk and Why Do We Love It in Lattes?
Frothed milk is essentially milk that has been aerated, creating a light, airy foam with tiny bubbles. This process transforms liquid milk into a creamy, voluminous texture that adds a luxurious mouthfeel and visual appeal to beverages like lattes, cappuccinos, and macchiatos. The magic behind frothed milk lies in its proteins and fats: when air is incorporated and the milk is heated, these components stabilize the air bubbles, forming a stable, delicious foam that floats atop your coffee. It provides a delightful contrast to the strong espresso, mellowing its intensity and adding a touch of sweetness and richness.
The Simple Microwave Method: A Step-by-Step Guide
Creating perfectly frothed milk in your microwave is incredibly straightforward. Follow these steps to achieve a rich, creamy foam every time:
Step 1: Choose Your Container
|
Our Picks for the Best Microwave oven in 2026
As an Amazon Associate I earn from qualifying purchases.
|
||
| Num | Product | Action |
|---|---|---|
| 1 | Chefman Countertop Microwave Oven 0.7 Cu. Ft., 700 Watts with 10 Power Levels, 6 Cooking Presets with One-Touch Express Cook, Eco Mode, Child Safety Lock, & Mute Button - Black |

|
| 2 | BLACK+DECKER EM720CB7 Digital Microwave Oven with Turntable Push-Button Door, Child Safety Lock, 700W, Stainless Steel, 0.7 Cu.ft |
|
| 3 | COMFEE' Retro Small Microwave Oven With Compact Size, 9 Preset Menus, Position-Memory Turntable, Mute Function, Countertop Microwave For Small Spaces, 0.7 Cu Ft/700W, Green, AM720C2RA-G |
|
| 4 | COMFEE' Retro Small Microwave Oven With Compact Size, 9 Preset Menus, Position-Memory Turntable, Mute Function, Countertop, Perfect For Small Spaces, 0.7 Cu Ft/700W, Red, AM720C2RA-R |
|
| 5 | GASLAND 30 Inch Over-the-Range Microwave Oven, 1.7 Cu.Ft Over Stove Microwave, 1000W with 10 Power Levels, Sensor & One-Touch Cooking, 300 CFM Venting, LED Cooktop Light, Black Kitchen Microwave |
|
| 6 | TOSHIBA EM131A5C-BS Countertop Microwave Ovens 1.2 Cu Ft, 12.4" Removable Turntable Smart Humidity Sensor 12 Auto Menus Mute Function ECO Mode Easy Clean Interior Black Color 1000W |
|
| 7 | COMFEE' EM720CPL-PMB Countertop Microwave Oven with Sound On/Off, ECO Mode and Easy One-Touch Buttons, 0.7cu.ft, 700W, Black |
|
| 8 | COMFEE CMO-C20M1WH Retro Microwave with 11 power levels, Fast Multi-stage Cooking, Turntable Reset Function Kitchen Timer, Speedy Cooking, Weight/Time Defrost, Memory function, Children Lock, 700W |
|
| 9 | TOSHIBA EM131A5C-SS Countertop Microwave Ovens 1.2 Cu Ft with 12.4" Removable Turntable Smart Humidity Sensor, 12 Auto Menus Mute Function ECO Mode Easy Clean Interior, 1000W, Silver |
|
| 10 | COMFEE' Retro Small Microwave Oven With Compact Size, 9 Preset Menus, Position-Memory Turntable, Mute Function, Countertop Perfect For Spaces, 0.7 Cu Ft/700W, Cream, AM720C2RA-A |
|
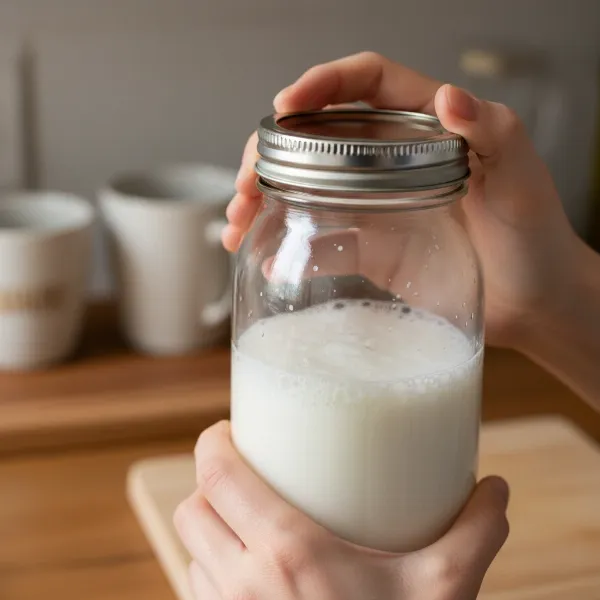
Start with a clean, microwave-safe container that has a tight-fitting, leak-proof lid. A mason jar is often the top choice due to its durability and secure seal, but any glass jar or ceramic container with a reliable lid will work. It’s crucial not to use metal in the microwave. Fill your chosen container with your preferred milk, but do not fill it more than halfway. This is a vital step, as the milk needs ample space to expand and create foam.
Step 2: Shake It Up!
Once your milk is in the container and the lid is securely fastened, it’s time to shake. Vigorously shake the jar for about 30 to 60 seconds. The goal here is to introduce as much air into the milk as possible, creating a substantial amount of initial foam. You’ll notice the milk’s volume increasing and a layer of bubbles forming as you shake. The longer and more energetically you shake, the more foam you’re likely to generate.
 A person vigorously shaking a mason jar filled with milk to create foam for a latte.
Step 3: Microwave for Perfection
This is a critical stage. Before placing the container in the microwave, remove the lid completely. Microwaving with a sealed lid can be dangerous due to pressure buildup. Heat the shaken, lid-free milk in the microwave for 30 to 60 seconds. The exact time will depend on your microwave’s wattage and the amount of milk. You want the milk to be warm to the touch, but not scalding hot or boiling. Overheating can break down the foam and even curdle the milk, giving it an unpleasant flavor. Start with 30 seconds, then check every 10-15 seconds until it reaches the desired warmth and the foam has stabilized and risen to the top. The microwave’s heat stabilizes the tiny air bubbles created by shaking, preventing them from collapsing quickly.
Step 4: The Finishing Touch
Once your milk is perfectly frothed and heated, carefully remove it from the microwave. You’ll observe a distinct layer of warm, frothed milk sitting on top of the liquid milk. Gently tap the bottom of the jar on a countertop a few times to release any large, unstable bubbles, leaving you with a finer, more uniform foam. Now, simply pour the liquid milk into your coffee, using a spoon to hold back the foam if you want to add it last, or spoon the creamy froth directly onto your latte for that signature cloud-like topping.
 Hands pouring creamy, frothy milk from a mason jar into a mug of black coffee, forming a latte.
Best Types of Milk for Microwave Frothing
The type of milk you choose can significantly impact the quality and quantity of your froth. Understanding these differences can help you achieve your desired latte texture:
- Whole Milk: Often considered the gold standard for frothing due to its higher fat content. It produces a rich, creamy, and stable foam with a velvety texture that holds up well.
- 2% Milk: A great middle-ground option, 2% milk still provides good frothing capabilities, yielding a decent amount of foam with a slightly lighter consistency than whole milk.
- Skim Milk: While skim milk froths easily and creates a large volume of very light, airy foam, it tends to be less stable and dissipates quicker due to its minimal fat content.
- Non-Dairy Milks: The frothing performance of plant-based milks varies widely.
- Oat Milk: Many baristas swear by oat milk, especially “barista blend” varieties, for its ability to create a creamy, stable foam similar to dairy milk.
- Almond Milk: Can froth, but often produces a thinner, less stable foam. Barista blends tend to work better.
- Soy Milk: Generally froths well, producing a rich foam, but some people notice a slight “beany” flavor when heated.
- Coconut Milk: Typically does not froth well for lattes, often separating or creating a very thin foam.
Experiment with different types to find your personal favorite for microwave frothing.
Tips for Achieving the Perfect Froth
To consistently achieve excellent frothed milk, keep these expert tips in mind:
- Don’t Overfill: Remember the halfway rule for your container. Too much milk means not enough space for air, resulting in less foam.
- Shake Vigorously: The more air you incorporate during the shaking phase, the more potential foam you’ll create. Don’t be shy with your shaking!
- Monitor Microwaving Time: Overheating milk not only compromises its flavor but also breaks down the delicate foam structure. Heat just until warm, not boiling.
- Experiment with Milk Temperatures: While cold milk often froths better initially when shaken, heating it after helps stabilize the foam. Some argue that starting with slightly warmer milk can also work, but cold milk generally offers more volume.
- Use Clean Containers: Any residue can inhibit frothing, so ensure your jar is spotless.
- Practice Makes Perfect: Like any good skill, frothing milk takes a little practice. Don’t be discouraged if your first attempt isn’t café-perfect.
Common Mistakes to Avoid
While the microwave frothing method is forgiving, steering clear of these common pitfalls will guarantee better results:
- Microwaving with the Lid On: This is a significant safety hazard. As milk heats, steam builds pressure, and a sealed container can explode. Always remove the lid before microwaving.
- Overheating the Milk: Beyond destroying the foam, milk that is too hot can develop a “scalded” taste, which will negatively impact your latte. Aim for warm, approximately 140-150°F (60-65°C), not boiling.
- Not Shaking Enough: Insufficient shaking means less air is incorporated, leading to thin, disappointing foam. Give it a good, solid shake!
- Using the Wrong Container: A container that isn’t microwave-safe or doesn’t have a secure lid for shaking will make the process difficult or even unsafe.
- Ignoring the Foam Layer: After microwaving, some larger bubbles may be present. A gentle tap on the counter helps consolidate the foam into a smoother, more desirable texture.
Enhancing Your Latte Experience Beyond the Microwave
Once you’ve mastered the art of microwave-frothed milk, you can further enhance your homemade lattes:
- Add Flavorings: Stir in a touch of vanilla extract, cinnamon, or a drizzle of chocolate syrup to your coffee before adding the milk.
- Basic Latte Art: Once you pour the frothed milk, try gently swirling the mug to create a simple design, or use a toothpick to drag through the foam for a basic heart or leaf shape.
- Serving Suggestions: Pair your perfect latte with a homemade pastry or enjoy it alongside a good book for a truly indulgent moment.
Conclusion: Elevate Your Coffee Game at Home
Frothing milk for lattes doesn’t require expensive equipment or a trip to a bustling coffee shop. With just a microwave, a jar, and a few simple steps, you can achieve wonderfully creamy, stable foam right in your own kitchen. This accessible method empowers you to enjoy personalized, café-quality beverages whenever the craving strikes, making your daily coffee ritual a more luxurious and satisfying experience. Embrace your inner barista and start experimenting with different milks and flavors to discover your ultimate homemade latte.
What’s your favorite milk to froth, and what unique flavors do you add to your homemade lattes?
Frequently Asked Questions
Can I froth milk in a microwave without a lid?
No, you generally need a lid for the initial shaking step to incorporate air and create foam. However, it is crucial to remove the lid before placing the container in the microwave to prevent dangerous pressure buildup.
Does the type of milk really matter for frothing?
Absolutely. Whole milk typically yields the creamiest, most stable froth due to its fat content, while skim milk produces a lighter, airier, but less stable foam. Non-dairy milks, particularly barista blends of oat or soy, can also froth well, though results vary by brand and type.
How do I know if my milk is frothed enough?
You’ll know your milk is frothed enough when it has significantly increased in volume and developed a visible, stable layer of small bubbles on top, resembling a cloud. It should be warm, not boiling, and have a smooth, velvety consistency.
Can I use a regular mug instead of a jar?
You can heat milk in a regular microwave-safe mug. However, you won’t be able to shake it vigorously with a lid to create foam. For frothing, a container with a secure lid is essential for the shaking step before microwaving.
Is it safe to microwave milk in a mason jar?
Yes, it is generally safe to microwave milk in a glass mason jar, provided you remove the metal lid and ring before heating. Glass jars are microwave-safe, but metal components are not and can cause arcing or damage to your microwave.