Have you ever wondered if your microwave is truly living up to its advertised power? Or perhaps you’ve noticed your food isn’t heating as consistently as it used to? Understanding and testing your microwave’s power output is a crucial step to ensure perfectly cooked meals and efficient operation. This guide will walk you through simple, effective methods to gauge your microwave oven’s performance using just water, helping you master your kitchen appliance and achieve consistent culinary results every time.
Understanding Microwave Power Output and Why It Matters
A microwave oven cooks food by emitting electromagnetic waves that excite water molecules, generating heat. The “power output” or “wattage” of your microwave refers to the amount of microwave energy it can deliver, typically ranging from 600 to 1200 watts. This wattage directly influences cooking times and efficiency. A higher wattage generally means faster cooking and more thorough heating. Over time, components can degrade, leading to a reduction in actual power output, which can significantly affect your cooking results and lead to frustrating inconsistencies. Knowing how to test this can save you from undercooked meals and wasted energy.
What is Microwave Power Output?
|
Our Picks for the Best Microwave oven in 2026
As an Amazon Associate I earn from qualifying purchases.
|
||
| Num | Product | Action |
|---|---|---|
| 1 | TOSHIBA EM131A5C-SS Countertop Microwave Ovens 1.2 Cu Ft with 12.4" Removable Turntable Smart Humidity Sensor, 12 Auto Menus Mute Function ECO Mode Easy Clean Interior, 1000W, Silver |

|
| 2 | COMFEE' Retro Small Microwave Oven With Compact Size, 9 Preset Menus, Position-Memory Turntable, Mute Function, Countertop Perfect For Spaces, 0.7 Cu Ft/700W, Cream, AM720C2RA-A |
|
| 3 | TOSHIBA EM131A5C-BS Countertop Microwave Ovens 1.2 Cu Ft, 12.4" Removable Turntable Smart Humidity Sensor 12 Auto Menus Mute Function ECO Mode Easy Clean Interior Black Color 1000W |
|
| 4 | COMFEE' Retro Small Microwave Oven With Compact Size, 9 Preset Menus, Position-Memory Turntable, Mute Function, Countertop Microwave For Small Spaces, 0.7 Cu Ft/700W, Green, AM720C2RA-G |
|
| 5 | COMFEE CMO-C20M1WH Retro Microwave with 11 power levels, Fast Multi-stage Cooking, Turntable Reset Function Kitchen Timer, Speedy Cooking, Weight/Time Defrost, Memory function, Children Lock, 700W |
|
| 6 | COMFEE' EM720CPL-PMB Countertop Microwave Oven with Sound On/Off, ECO Mode and Easy One-Touch Buttons, 0.7cu.ft, 700W, Black |
|
| 7 | BLACK+DECKER EM720CB7 Digital Microwave Oven with Turntable Push-Button Door, Child Safety Lock, 700W, Stainless Steel, 0.7 Cu.ft |
|
| 8 | COMFEE' Retro Small Microwave Oven With Compact Size, 9 Preset Menus, Position-Memory Turntable, Mute Function, Countertop, Perfect For Small Spaces, 0.7 Cu Ft/700W, Red, AM720C2RA-R |
|
| 9 | GASLAND 30 Inch Over-the-Range Microwave Oven, 1.7 Cu.Ft Over Stove Microwave, 1000W with 10 Power Levels, Sensor & One-Touch Cooking, 300 CFM Venting, LED Cooktop Light, Black Kitchen Microwave |
|
| 10 | Chefman Countertop Microwave Oven 0.7 Cu. Ft., 700 Watts with 10 Power Levels, 6 Cooking Presets with One-Touch Express Cook, Eco Mode, Child Safety Lock, & Mute Button - Black |
|
Microwave power output is the rate at which your appliance converts electrical energy into microwave energy. It’s not just a number on the label; it dictates how quickly and evenly your food will cook. A microwave works by generating microwaves that penetrate food, causing its water content to vibrate rapidly and produce heat. If the power output is lower than expected, your food will take longer to cook and might heat unevenly.
Why Test Your Microwave’s Power Output?
Testing your microwave’s power output offers several benefits. Firstly, it ensures consistent cooking, preventing unpleasant surprises like cold spots or undercooked centers. Secondly, it’s an excellent troubleshooting step if you suspect your microwave is performing poorly. Thirdly, it helps you adapt recipes, as most recipes assume a certain wattage (often 1000-1200 watts). If your microwave’s actual output is lower, you can adjust cooking times accordingly.
Simple Water-Based Tests to Gauge Microwave Performance
While precise laboratory testing involves complex equipment, you can effectively estimate your microwave’s power output or performance at home using simple water-based methods. These tests are straightforward and require minimal equipment, making them accessible for any home cook.
The Quick “Water Boil Test” for Wattage Estimation
This method is perfect for a quick check to estimate your microwave’s wattage based on how fast it can bring water to a boil. It’s a fantastic indicator of your microwave’s overall heating capability.
What You’ll Need:
- A glass measuring cup (2-cup capacity is ideal)
- Exactly 1 cup (8 fluid ounces or approximately 240ml) of ice-cold water
- Ice cubes (to chill water)
- A stopwatch or your microwave’s built-in timer
Step-by-Step Guide:
- Prepare the water: Fill your measuring cup with water and add a few ice cubes. Stir until the water is thoroughly chilled, then remove the ice cubes.
- Measure precisely: Pour out any excess water, ensuring you have exactly 1 cup of ice-cold water remaining in the glass measuring cup.
- Position in microwave: Place the measuring cup in the center of your microwave oven.
- Heat on high: Set your microwave to its highest power level and begin heating.
- Observe and record: Watch the water carefully. Start your stopwatch as soon as the microwave begins heating. Stop the timer immediately when the water reaches a full, rolling boil. This is when large, rapid bubbles are breaking the surface consistently. The test should not exceed 4 minutes.
Interpreting Your Results:
The time it takes for the water to boil provides a good estimate of your microwave’s wattage:
| Boiling Time | Estimated Wattage (Approx.) | Performance Level |
|---|---|---|
| Less than 2 minutes | 1000 watts or more | Very High Wattage |
| Around 2.5 minutes | 800 watts or more | High Wattage |
| Around 3 minutes | 650-700 watts or more | Average Wattage |
| 3 to 4 minutes | 300-500 watts | Slow/Lower Wattage |
Limitations of this test: This method provides an estimate and can be influenced by altitude, initial water temperature, and even the type of glass used. However, it’s a reliable indicator for home use.
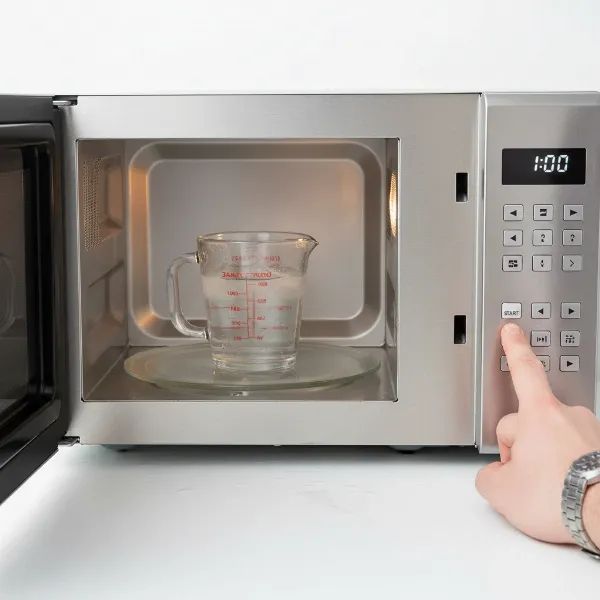 A person performing the water boil test with a measuring cup inside a microwave.
The More Precise “Temperature Rise Test” for Performance Assessment
For a slightly more scientific approach that measures actual performance rather than just boiling time, you can perform a temperature rise test. This method is often recommended by appliance manufacturers for assessing heating efficiency.
What You’ll Need:
- A large glass bowl (preferably a 2-quart or 2-liter glass measuring bowl)
- Exactly 1 quart (approximately 1 liter) of water
- A reliable kitchen thermometer (digital is best)
- A stopwatch or microwave timer
Step-by-Step Guide:
- Prepare the water: Fill the glass bowl with 1 quart (about 1 liter) of water. Ensure the water temperature is between 59 to 75 degrees Fahrenheit (15 to 24 degrees Celsius). Adjust with small amounts of hot or cold water if necessary.
- Measure initial temperature: Use your thermometer to accurately measure and record the initial temperature of the water.
- Position in microwave: Place the bowl with water in the center of the microwave oven cavity.
- Heat for specific time: Set your microwave to its highest power level and heat the water for exactly 2 minutes and 30 seconds.
- Measure final temperature: Immediately after the heating cycle stops, carefully remove the bowl. Stir the water gently and measure its final temperature with the thermometer. Record this reading.
- Calculate temperature rise: Subtract the initial water temperature from the final water temperature to determine the temperature rise.
Interpreting Your Results:
- A temperature rise in the range of 28 to 40 degrees Fahrenheit (15 to 22 degrees Celsius) typically indicates that your microwave oven is heating properly and performing as expected.
- If your microwave shows a significantly lower temperature rise (e.g., less than 20°F or 10°C), it might be operating below its optimal power output.
This test provides a more quantitative measure of performance, helping you understand if your microwave’s heating capabilities have diminished.
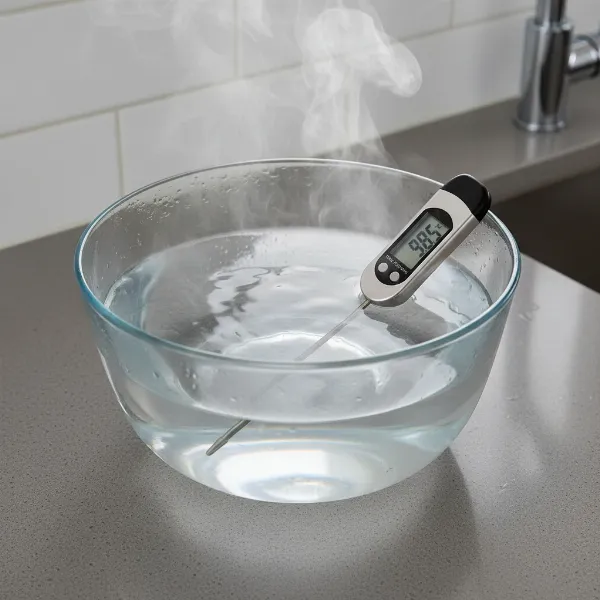 A digital thermometer measuring the temperature of water in a glass bowl after microwave heating.
What to Do if Your Microwave is Underperforming
If your microwave doesn’t pass these tests, showing signs of significantly reduced power output, don’t despair immediately. There are a few steps you can take:
- Thorough Cleaning: A dirty microwave, especially around the wave guide cover, can impede microwave energy. Give your microwave a deep clean, paying attention to all interior surfaces.
- Check for Obstructions: Ensure the turntable is spinning freely and there are no metallic objects that could be interfering with microwave distribution.
- Professional Inspection: If cleaning doesn’t help, it might indicate a more serious internal issue, such as a failing magnetron (the component that generates microwaves) or a faulty capacitor. In this case, it’s best to consult a qualified appliance technician.
- Consider Replacement: For older microwaves, or those requiring expensive repairs, investing in a new microwave might be a more cost-effective solution in the long run. Modern microwaves often come with improved efficiency and features.
General Microwave Maintenance for Longevity
Maintaining your microwave oven properly can help ensure its consistent performance and extend its lifespan. Simple habits can make a big difference.
- Regular Cleaning: Wipe down the interior after each use to prevent food splatters from hardening. This prevents unpleasant odors and maintains heating efficiency.
- Avoid Running Empty: Never run your microwave when it’s empty, as this can damage the magnetron. Always have food or a cup of water inside.
- Use Microwave-Safe Cookware: Always use dishes and containers specifically labeled as microwave-safe. Metal containers can cause arcing and damage the appliance.
- Proper Placement: Ensure your microwave is placed on a stable, level surface with adequate ventilation around it to prevent overheating.
- Door Seal Check: Regularly inspect the door seal for any signs of damage or wear. A compromised seal can lead to microwave leakage.
Important Safety Considerations
Safety should always be a priority when using a microwave oven. Following these guidelines can prevent accidents and ensure the safe operation of your appliance.
- No Metal Objects: Never place aluminum foil, metal containers, or dishes with metallic trim in the microwave. They can cause sparks, fire, and damage the oven.
- Ventilation is Key: Ensure the microwave’s air vents are clear and unobstructed to prevent overheating.
- Avoid Overheating Liquids: Superheated liquids can suddenly boil over when disturbed. Stir liquids before and after heating, and allow them to stand for a moment.
- Do Not Self-Repair: If your microwave is malfunctioning, especially if you suspect electrical issues, do not attempt to repair it yourself. Contact a professional technician.
- Children and Microwaves: Supervise children when they use the microwave and teach them safe operating procedures.
Conclusion: Empowering Your Microwave Cooking
Testing your microwave oven’s power output with water is a simple yet powerful way to understand its performance and ensure reliable cooking. Whether you opt for the quick “water boil test” for an estimate or the more precise “temperature rise test,” these methods empower you to gauge your appliance’s efficiency. Regular testing, combined with diligent maintenance and adherence to safety guidelines, will not only extend the life of your microwave but also guarantee that every meal comes out perfectly cooked, meeting your culinary expectations. Take control of your cooking experience by understanding your microwave’s true potential.
Frequently Asked Questions
Can I test microwave wattage without a thermometer?
Yes, the simple “Water Boil Test” allows you to estimate your microwave’s wattage by observing how quickly a specific amount of cold water reaches a rolling boil, without needing a thermometer. This provides a good general idea of your microwave’s heating power.
How often should I test my microwave’s power?
It’s a good practice to test your microwave’s power output every 6-12 months, or whenever you notice inconsistencies in cooking performance. Regular checks help you catch potential issues early and adjust cooking times as needed.
What does microwave wattage mean for cooking?
Microwave wattage refers to the power level of the oven, directly impacting cooking speed and efficiency. A higher wattage means food heats faster and more evenly. Recipes often specify cooking times based on a typical wattage, so knowing yours helps you adapt for best results.
Is a higher wattage microwave better?
Generally, a higher wattage microwave (e.g., 1000-1200 watts) is considered better because it cooks food more quickly and often more evenly. However, lower wattage microwaves can still be effective, especially for smaller portions or for those who prefer slower, gentler heating.