Tired of waiting for perfectly cooked rice, or struggling with sticky, mushy, or burnt grains? The secret to achieving fluffy, delicious rice quickly and easily might be sitting right on your countertop: your microwave oven. Forget the stovetop fuss or the dedicated rice cooker; with a few simple steps, you can master microwave rice in under 15 minutes of active cooking time, making it ideal for busy weeknights or when you need a speedy side dish. This guide will walk you through the essential techniques to ensure fluffy, tender rice every single time, saving you time and simplifying cleanup.
Why Cook Rice in a Microwave Oven?
In today’s fast-paced world, convenience is key, and cooking rice in a microwave oven offers a compelling solution. The primary advantage is undoubtedly speed and ease. For single servings or small families, the microwave bypasses the need for large pots or specialized appliances, making it a fantastic alternative when time is short or kitchen space is limited. It’s a hands-off method that frees up your stovetop for other dishes, and with proper technique, the results are consistently impressive. Moreover, cleaning up a single microwave-safe dish is often far simpler than scrubbing a burnt pot from stovetop cooking.
What You’ll Need for Perfect Microwave Rice
Before you begin, gathering the right ingredients and equipment is crucial for success.
Ingredients:
- White Rice: Long-grain white rice (like jasmine or basmati) is generally recommended for microwave cooking due to its quicker cooking time compared to brown or wild rice, which require more water and extended cooking.
- Water: The quality of your water can impact the final taste.
- Salt (Optional): A pinch enhances flavor.
- Butter or Oil (Optional): A small amount can help prevent sticking and add richness.
Equipment:
- Microwave-Safe Bowl: This is perhaps the most important piece of equipment. Choose a deep, high-sided bowl, preferably made of glass or ceramic. It should be large enough to accommodate the rice and water comfortably, with plenty of headspace to prevent boil-overs (at least double the volume of your rice and water combined).
- Microwave-Safe Lid: A loose-fitting lid, a vented microwave cover, or even a microwave-safe plate placed on top will work to trap steam and ensure even cooking while allowing some steam to escape. Avoid tightly sealing the container.
- Measuring Cups: Accurate measurements of rice and water are fundamental for the perfect texture.
 Essential equipment and ingredients for cooking rice in a microwave oven, including a deep bowl.
The Golden Ratio: Rice to Water
The correct water-to-rice ratio is paramount for achieving fluffy, separate grains. While traditional stovetop methods often call for a 2:1 water-to-rice ratio, microwave cooking can sometimes require slight adjustments due to varying evaporation rates.
- For most white rice varieties: A good starting point is 1 cup of white rice to 1.5 cups of water. Some recipes may suggest up to 2 cups of water per cup of rice, particularly if your microwave tends to dry out food or if you prefer a softer grain.
- The “Knuckle Test”: As an alternative to measuring, some home cooks use the “knuckle test.” After adding the rinsed rice to your bowl, place your index finger on the surface of the rice. Pour water until it reaches your first knuckle. This method can be surprisingly effective, especially if you lack measuring tools. Always ensure the water level covers the rice sufficiently for absorption.
Remember that different types of rice (e.g., long-grain, medium-grain, short-grain) may have slightly different ideal water ratios, so consulting the rice package instructions for specific recommendations is always a good idea.
Step-by-Step Guide: 15-Minute Microwave Rice
Follow these steps to prepare perfect, fluffy rice in your microwave oven in approximately 15 minutes of active cooking:
Step 1: Rinse the Rice Thoroughly
|
Our Picks for the Best Microwave oven in 2026
As an Amazon Associate I earn from qualifying purchases.
|
||
| Num | Product | Action |
|---|---|---|
| 1 | COMFEE' Retro Small Microwave Oven With Compact Size, 9 Preset Menus, Position-Memory Turntable, Mute Function, Countertop Microwave For Small Spaces, 0.7 Cu Ft/700W, Green, AM720C2RA-G |

|
| 2 | COMFEE CMO-C20M1WH Retro Microwave with 11 power levels, Fast Multi-stage Cooking, Turntable Reset Function Kitchen Timer, Speedy Cooking, Weight/Time Defrost, Memory function, Children Lock, 700W |
|
| 3 | GASLAND 30 Inch Over-the-Range Microwave Oven, 1.7 Cu.Ft Over Stove Microwave, 1000W with 10 Power Levels, Sensor & One-Touch Cooking, 300 CFM Venting, LED Cooktop Light, Black Kitchen Microwave |
|
| 4 | TOSHIBA EM131A5C-BS Countertop Microwave Ovens 1.2 Cu Ft, 12.4" Removable Turntable Smart Humidity Sensor 12 Auto Menus Mute Function ECO Mode Easy Clean Interior Black Color 1000W |
|
| 5 | COMFEE' Retro Small Microwave Oven With Compact Size, 9 Preset Menus, Position-Memory Turntable, Mute Function, Countertop, Perfect For Small Spaces, 0.7 Cu Ft/700W, Red, AM720C2RA-R |
|
| 6 | Chefman Countertop Microwave Oven 0.7 Cu. Ft., 700 Watts with 10 Power Levels, 6 Cooking Presets with One-Touch Express Cook, Eco Mode, Child Safety Lock, & Mute Button - Black |
|
| 7 | COMFEE' Retro Small Microwave Oven With Compact Size, 9 Preset Menus, Position-Memory Turntable, Mute Function, Countertop Perfect For Spaces, 0.7 Cu Ft/700W, Cream, AM720C2RA-A |
|
| 8 | TOSHIBA EM131A5C-SS Countertop Microwave Ovens 1.2 Cu Ft with 12.4" Removable Turntable Smart Humidity Sensor, 12 Auto Menus Mute Function ECO Mode Easy Clean Interior, 1000W, Silver |
|
| 9 | BLACK+DECKER EM720CB7 Digital Microwave Oven with Turntable Push-Button Door, Child Safety Lock, 700W, Stainless Steel, 0.7 Cu.ft |
|
| 10 | COMFEE' EM720CPL-PMB Countertop Microwave Oven with Sound On/Off, ECO Mode and Easy One-Touch Buttons, 0.7cu.ft, 700W, Black |
|
Place your measured rice in a fine-mesh strainer and rinse it under cold running water. Stir the rice with your fingers as the water runs through. Continue rinsing until the water runs mostly clear. This step is crucial for removing excess starch, which helps prevent the rice from becoming sticky and promotes a fluffier texture.
Step 2: Combine Ingredients
Transfer the rinsed rice to your deep, microwave-safe bowl. Add the measured water according to your chosen ratio (e.g., 1.5 cups water for every 1 cup of rice). If desired, stir in a pinch of salt and a small amount of butter or olive oil for added flavor and to prevent sticking.
Step 3: Microwave on High (5 Minutes)
Place the bowl, uncovered or loosely covered, into the microwave oven. Cook on HIGH power for 5 minutes. This initial high-heat burst brings the water to a rapid boil, kick-starting the cooking process and hydrating the rice quickly. Watch carefully for boil-overs during this stage. If it starts to foam excessively, pause, stir, and consider a slightly looser lid or a deeper bowl next time.
Step 4: Reduce Power and Continue Cooking (10 Minutes)
After the initial 5 minutes, carefully remove the bowl (it will be hot!). Stir the rice once. Then, reduce your microwave’s power setting to 50% (medium power). Cover the bowl loosely with its lid and cook for another 10 minutes. This lower power setting allows the rice to simmer gently, absorbing the remaining water evenly and cooking through without drying out or becoming mushy. The total active microwave cooking time for these two stages is now 15 minutes.
Step 5: Rest the Rice (5-10 Minutes)
Once the microwave cooking cycle is complete, do not remove the lid or stir the rice immediately. Carefully take the bowl out of the microwave oven (using oven mitts) and let it rest, still covered, for 5 to 10 minutes on your countertop. This resting period is critical; it allows the residual steam to finish cooking the rice, ensuring all moisture is absorbed and the grains become perfectly tender and fluffy. Peeking during this time can release essential steam, leading to unevenly cooked rice.
Step 6: Fluff and Serve
After the resting period, remove the lid. Use a fork to gently fluff the rice, separating the grains. Your perfect, fluffy microwave rice is now ready to serve!
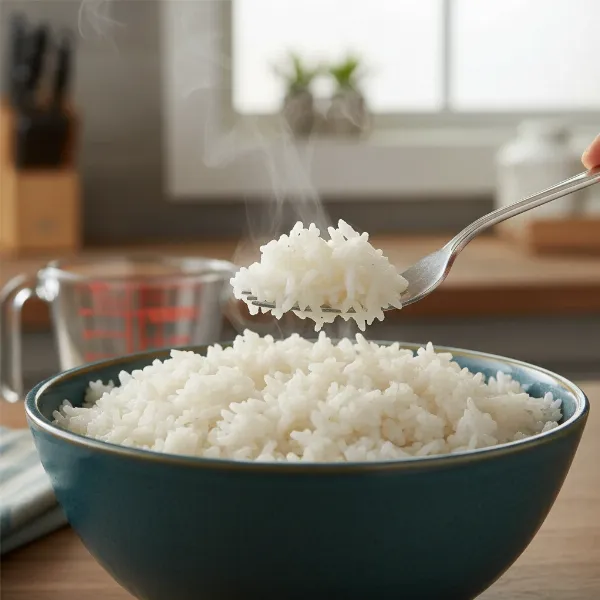 Perfectly cooked, fluffy white rice in a microwave-safe bowl, ready to be served.
Tips for Perfectly Fluffy Rice Every Time
Achieving consistent results with microwave rice often comes down to a few key techniques:
- Choose the Right Container: A deep, high-sided glass or ceramic bowl is ideal. Ensure it has enough room for the rice to expand without overflowing. A microwave-specific rice cooker can also be an excellent investment for consistent results.
- Prevent Boil-Overs: This is a common challenge. Using a sufficiently large bowl and a loose lid (or even a few layers of paper towels topped with a plate) can help. Some microwave rice cookers have built-in vents to manage steam. If your rice frequently boils over, consider slightly reducing the water or ensuring your lid isn’t too tight.
- Know Your Microwave’s Wattage: Microwave power levels vary significantly. A higher-wattage microwave (1000-1200 watts) might cook faster, while a lower-wattage unit (700-900 watts) may require an extra minute or two. Adjust cooking times in small increments (e.g., 1-2 minutes) if your rice is consistently under or overcooked.
- Don’t Peek During Resting: Resist the urge to lift the lid during the resting phase. This step is essential for the rice to steam and fully absorb moisture, leading to that coveted fluffy texture.
- Consider Warm Rinsing Water: Some experts suggest rinsing rice with warm tap water as it helps the grains hydrate slightly during the rinsing process, contributing to more even cooking in the microwave.
Common Microwave Rice Mistakes (And How to Fix Them)
Even with a reliable method, you might encounter issues. Here’s how to troubleshoot common microwave rice problems:
- Undercooked or Dry Rice:
- Cause: Not enough water, insufficient cooking time, or your microwave’s power is lower than expected.
- Fix: Add 1-2 tablespoons of hot water, cover, and microwave for another 1-2 minutes on medium power, then let it rest again. Next time, slightly increase the water ratio or cooking time.
- Mushy or Soggy Rice:
- Cause: Too much water, cooked for too long, or the lid was too tight during cooking/resting.
- Fix: If it’s only slightly mushy, spreading it thinly on a baking sheet and letting it air dry for a few minutes can help. For future batches, reduce the water slightly or ensure your lid allows some steam to escape.
- Boil-Overs:
- Cause: Bowl too small, too much water, or lid too tight.
- Fix: Use a larger, deeper bowl. Reduce the water by a tiny amount. Ensure your lid is vented or loosely placed. You can also monitor during the high-power phase and pause if it’s about to overflow.
Conclusion: Mastering Microwave Oven Rice for Ultimate Convenience
Cooking perfect rice in your microwave oven is a game-changer for anyone seeking efficiency and delicious results. By following a simple, structured approach—from proper rinsing and accurate water ratios to strategic cooking times and essential resting—you can consistently achieve fluffy, tender grains in a fraction of the time compared to traditional methods. Embrace the convenience and unlock the full potential of your microwave oven for this versatile staple. With these tips, you’re well on your way to enjoying effortlessly perfect rice, ready to complement any meal.
Ready to elevate your meal prep? What’s your go-to dish to pair with freshly made microwave rice?
Frequently Asked Questions
How much water do I use for 1 cup of rice in the microwave?
For most white rice varieties, a common recommendation is 1.5 cups of water for every 1 cup of rice. This ratio helps ensure the rice absorbs enough moisture to become tender without becoming overly soggy. However, some prefer a 2:1 ratio for a softer result, and specific rice types might vary.
Can I cook brown rice in the microwave in 15 minutes?
While white rice can often be cooked in about 15 minutes of active microwave time, brown rice typically requires more water and a significantly longer cooking duration, often around 25-30 minutes or more, plus resting time. It is generally not suitable for a quick 15-minute microwave method.
What kind of bowl is best for cooking rice in a microwave oven?
The best bowl for cooking rice in a Microwave Oven is a deep, high-sided, microwave-safe container made of glass or ceramic. It should have at least twice the volume of your rice and water combined to prevent boil-overs. A microwave-safe lid (vented or loosely fitted) is also essential for trapping steam.
Why is my microwave rice sometimes mushy or dry?
Mushy rice usually results from too much water or overcooking, while dry rice is often due to insufficient water or not enough cooking time. Ensure you’re using the correct rice-to-water ratio and allow the rice to rest undisturbed after cooking to let it fully absorb moisture and achieve optimal texture.
Is it necessary to rinse rice before microwaving?
Yes, rinsing rice before microwaving is highly recommended. Rinsing removes excess starch from the surface of the grains, which is crucial for preventing the rice from clumping together and becoming sticky. This step contributes significantly to achieving light, fluffy, and separate grains in your final dish.